 Save
Save My neighbor Sarah threw a housewarming party last spring, and I wanted to bring something that felt special but wasn't going to stress me out in her new kitchen. I landed on these mini cheesecakes because they're small enough to feel elegant on a dessert bar, but honestly, they're just creamy, tangy, and satisfying in the way that makes people reach for a second one without thinking. The first batch I made, I was nervous about the baking time, but watching them set in the oven with that perfect slight jiggle in the center felt like nailing something important. Sarah's guests went quiet for a moment after tasting them, which is always a good sign.
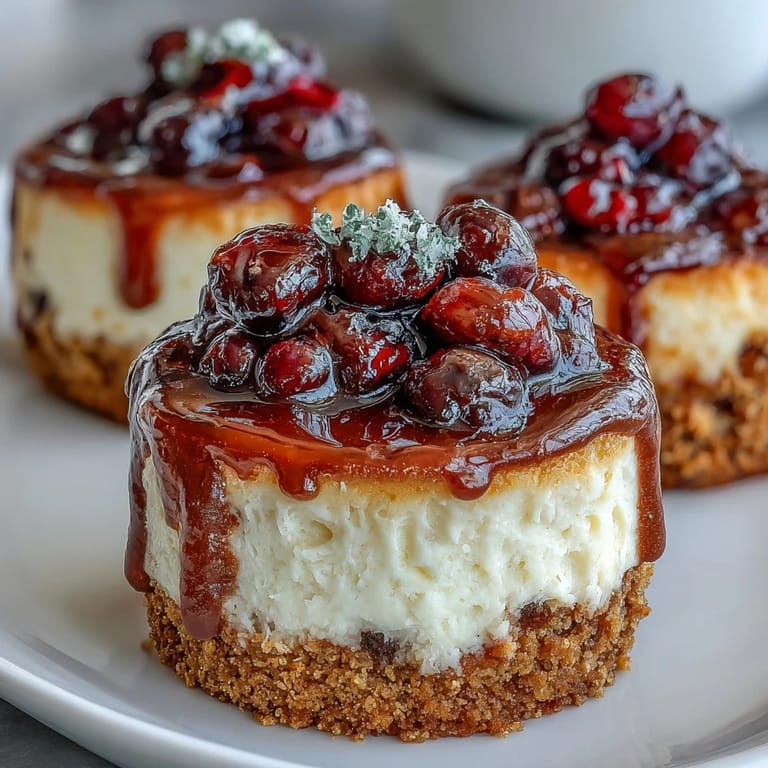
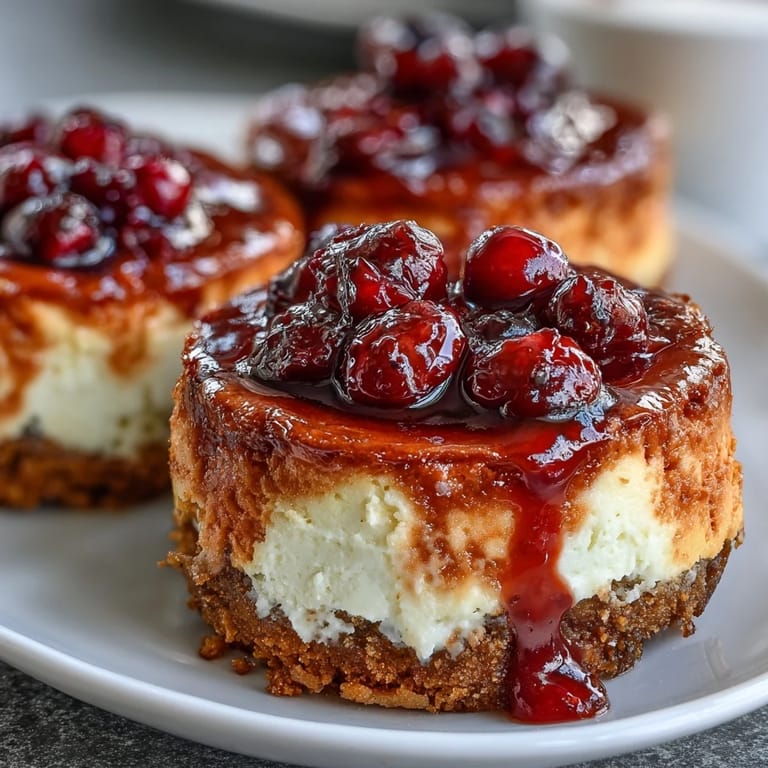
I baked three batches of these for my sister's engagement party, and I remember standing in my kitchen at midnight, filling tiny cups with cheesecake batter while music played from the next room. My hands were tired, but there was something oddly meditative about the repetition, and by the end, I had twenty-four perfect little cakes cooling on racks. The next morning, after they'd chilled overnight, I topped half with fresh raspberries and half with a berry compote, and watching people's faces light up when they grabbed one made all that midnight work feel completely worth it.
Ingredients
- Graham cracker crumbs: Use fresh ones if you can—they're way more flavorful than stale crumbs, and they bind better with the butter to create that satisfying crunch.
- Granulated sugar: Don't skip the mixing with butter for the crust; it helps everything blend into an even, golden base.
- Unsalted butter, melted: Melting it first ensures the crust mixes smoothly and presses down without crumbling.
- Cream cheese, softened: This is non-negotiable—cold cream cheese will create lumps, so leave it on the counter for at least an hour before you start beating it.
- Sour cream: It adds tanginess and keeps the filling tender; don't swap it for yogurt, which will change the texture.
- Eggs: Add them one at a time so they incorporate fully, and stop mixing the moment everything is combined to avoid overworking the batter.
- Vanilla extract: A full teaspoon gives you that classic cheesecake flavor without being obvious about it.
- All-purpose flour: Just a tablespoon prevents the filling from being too loose, and it also helps the cheesecakes hold their shape when you turn them out.
Tired of Takeout? 🥡
Get 10 meals you can make faster than delivery arrives. Seriously.
One email. No spam. Unsubscribe anytime.
Instructions
- Heat your oven and prep your pan:
- Preheat to 325°F and line your mini muffin tin with paper liners—they peel off cleanly later and make serving a breeze.
- Build your crust:
- Mix graham cracker crumbs with sugar and melted butter until it feels like wet sand, then press about a teaspoon firmly into each cup. You want a packed, even layer that won't crumble when you bite it.
- Create a smooth filling:
- Beat the softened cream cheese until it's completely smooth and fluffy, which takes a few minutes longer than you think it should. This step is what keeps lumps out of your final cheesecake.
- Combine with care:
- Add sugar to the cream cheese and mix until creamy, then add eggs one at a time, beating gently after each. Pour in the sour cream, vanilla, flour, and salt, mixing just until everything is combined—overmixing brings air bubbles that can cause cracks.
- Fill and bake:
- Spoon the filling over each crust until the cup is nearly full, then slide the pan into the oven for 18 to 20 minutes. They're done when the edges look set but the very center still jiggles slightly when you gently shake the pan.
- Cool gradually:
- Let them sit in the pan for 15 minutes so they don't shock your system with temperature change, then move them to a wire rack. This slow cooling helps prevent cracks from forming on top.
- Chill thoroughly:
- Give them at least an hour in the refrigerator—overnight is even better—so the filling becomes completely firm and slices cleanly.
- Top and serve:
- Add your toppings just before serving so fresh berries stay bright and whipped cream stays fluffy. A small spoon helps lift each cheesecake gently from the liner.
 Save
Save There was a moment at my sister's engagement party when I watched my seventy-year-old mom take a tiny cheesecake, close her eyes after the first bite, and just smile. She didn't say anything; she didn't need to. That's when I realized these weren't just desserts—they were small enough to share without a plate, personal enough to feel handmade, and elegant enough to matter for a celebration.
Make-Ahead Magic
The beauty of these mini cheesecakes is that you can bake them up to two days in advance and store them in an airtight container in the refrigerator. I've made them on a Wednesday evening for a Friday party and they were perfect, tasting fresher than if I'd rushed them together the day of. The crust stays crisp, the filling stays creamy, and you get to skip the anxiety of baking on the day you're actually hosting.
Flavor Variations Worth Trying
Once you nail the basic recipe, these cheesecakes become a canvas for whatever you're craving. I've swirled a tablespoon of lemon zest into the filling for bright, citrusy cakes, stirred in a teaspoon of cinnamon for something warm and cozy, and even tried a teaspoon of espresso powder for an unexpected coffee note. You can also infuse the flavor through toppings: a drizzle of caramel sauce, a sprinkle of crushed cookies, or even a tiny dollop of jam mixed into sour cream.
Serving and Storage Secrets
These little cakes shine at dessert bars, dinner parties, and celebrations, but they're also perfect for sneaking one before bed with a cup of tea. Keep them chilled until the moment you want to serve them—they firm up beautifully in the cold and slice cleanly without the filling squishing out. If you're storing leftovers, an airtight container in the fridge will keep them fresh for up to four days, though they never last that long in my house.
- Remove them from the refrigerator a few minutes before serving if they're too firm to bite easily.
- Paper liners peel away cleanly and make for easy, hands-free eating—especially helpful at parties.
- A hot, damp kitchen towel held against the paper liner for a few seconds makes peeling even easier if they stick.
 Save
Save These cheesecakes have become my go-to when I want to bring something that feels fancy but isn't pretentious, and that's made all the difference. Whether you're celebrating something big or just want to impress people you care about, twenty-four little moments of creamy, tangy, sweet perfection might be exactly what you need.
Recipe FAQs
- → What type of crust is used for these cheesecakes?
The crust combines graham cracker crumbs, sugar, and melted butter to create a crisp base for each mini cheesecake.
- → How long should the cheesecakes chill before serving?
Chill the cheesecakes for at least one hour to allow them to set and develop the best texture.
- → Can these cheesecakes be made ahead of time?
Yes, they can be prepared a day in advance and stored chilled, making them convenient for events.
- → Are there options for gluten-free variations?
To make them gluten-free, substitute regular graham crackers and flour with gluten-free alternatives.
- → What toppings complement these mini cheesecakes?
Fresh berries, fruit preserves, whipped cream, and chocolate shavings enhance flavor and presentation.
- → What equipment is needed to prepare these mini cheesecakes?
A 24-cup mini muffin tin, mixing bowls, an electric or hand mixer, measuring tools, and a wire rack are required.