 Save
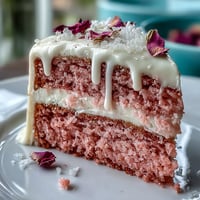
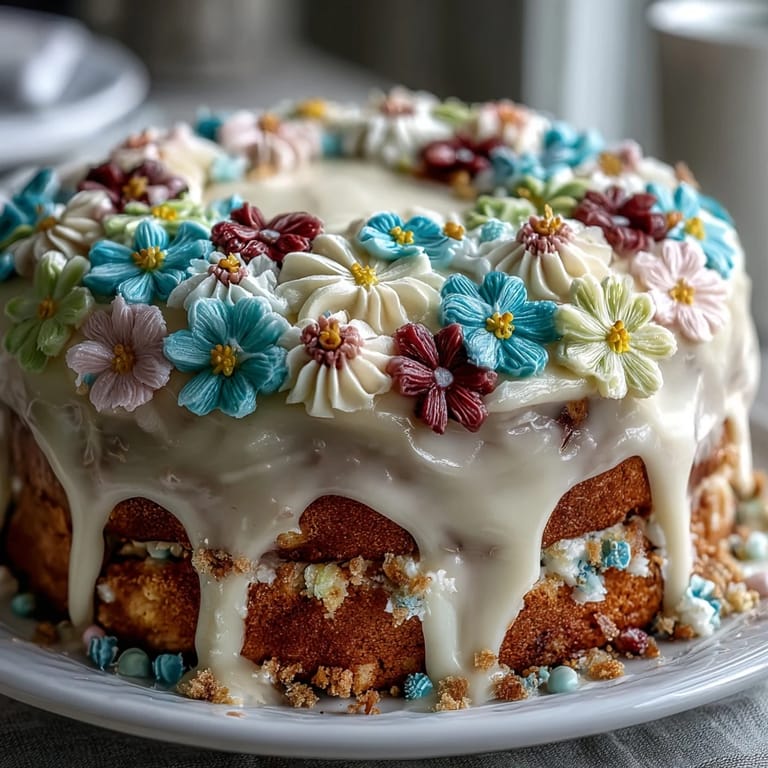
Save My sister called me three days before her birthday asking if I could bake her a cake—not just any cake, but one that looked like spring had landed on a plate. I found myself standing in the kitchen at midnight, sketching flower designs on paper and realizing I'd never actually piped buttercream flowers before. What started as nervous energy became something meditative; the soft pastels, the quiet hum of the mixer, the smell of vanilla filling the house while everyone slept. By the time I finished, I understood why people fall in love with cake decorating.
I'll never forget watching my sister's face when she saw it—not because it was perfectly executed (the lavender roses were a little wobbly), but because she could taste the care in every layer. Her friends asked for my number. That cake became the reason I started taking decorating seriously, turning a midnight panic into something I now look forward to.
Ingredients
- All-purpose flour (2 ½ cups): The foundation of a tender crumb; sifting it before measuring prevents a dense cake, though whisking in the bowl works just fine if you're short on tools.
- Baking powder (2 ½ tsp): This is what gives the cake its lift and delicate structure, so don't skip it or use baking soda as a swap.
- Salt (½ tsp): A tiny pinch that makes the vanilla sing without tasting salty itself.
- Unsalted butter (1 cup for cake, 1 ½ cups for buttercream): Room temperature is non-negotiable here; cold butter won't cream properly and you'll end up with a dense, grainy cake.
- Granulated sugar (2 cups): The creaming process with butter is what aerates the batter, so don't rush this step.
- Eggs (4 large): Also room temperature, which helps them incorporate smoothly and prevents the batter from looking curdled.
- Pure vanilla extract (1 tbsp for cake, 2 tsp for buttercream): Real vanilla makes a noticeable difference in both the flavor and the way the buttercream takes on color.
- Whole milk (1 cup for cake, ¼ cup for buttercream): Room temperature milk emulsifies better with the other ingredients, creating a silkier batter.
- Powdered sugar (6 cups): Sift it first, which removes lumps and makes the buttercream feel like velvet instead of gritty.
- Gel food coloring: Gel colorants are superior to liquid dyes because they won't thin out your buttercream; a tiny toothpick dab goes a long way.
Tired of Takeout? 🥡
Get 10 meals you can make faster than delivery arrives. Seriously.
One email. No spam. Unsubscribe anytime.
Instructions
- Set your stage:
- Preheat the oven to 350°F and grease three 8-inch cake pans with butter, then line the bottoms with parchment paper so nothing sticks. This small step saves you heartbreak later.
- Combine dry ingredients:
- Whisk flour, baking powder, and salt together in a medium bowl until evenly mixed. Setting this aside means you won't forget anything when you're adding it to the wet mixture.
- Cream butter and sugar:
- Beat softened butter and sugar on medium-high speed for 3 to 4 minutes until the mixture looks pale, fluffy, and lighter than when you started. This aerating step is crucial for the cake's tender crumb.
- Incorporate eggs:
- Add eggs one at a time, beating well after each addition so they fully incorporate. The batter might look slightly broken or curdled, but don't worry—the milk will come next and smooth it all out.
- Add vanilla:
- Mix in the vanilla extract until just combined.
- Alternate wet and dry:
- Add a third of the flour mixture, then half the milk, then another third of flour, then the remaining milk, and finally the last of the flour, beating on low speed between additions just until you don't see streaks of flour anymore. Overmixing at this point develops gluten and makes the cake tough.
- Divide and prepare for baking:
- Pour the batter evenly into the three prepared pans and smooth the tops with an offset spatula. Even layers bake more evenly.
- Bake with patience:
- Bake for 25 to 30 minutes until the tops are golden and a toothpick inserted into the center comes out clean or with just a few moist crumbs. Don't open the oven door before 25 minutes or you'll cause the cakes to sink.
- Cool completely:
- Let the cakes rest in their pans for 10 minutes, then turn them out onto a wire rack to cool all the way through. Warm cake is fragile and will crumble when you frost it.
- Make the buttercream:
- Beat softened butter until creamy, then gradually add sifted powdered sugar, milk, vanilla, and salt, beating for 3 to 4 minutes until fluffy and spreadable. If it's too soft, chill it for a few minutes; if it's too stiff, add a splash more milk.
- Tint with color:
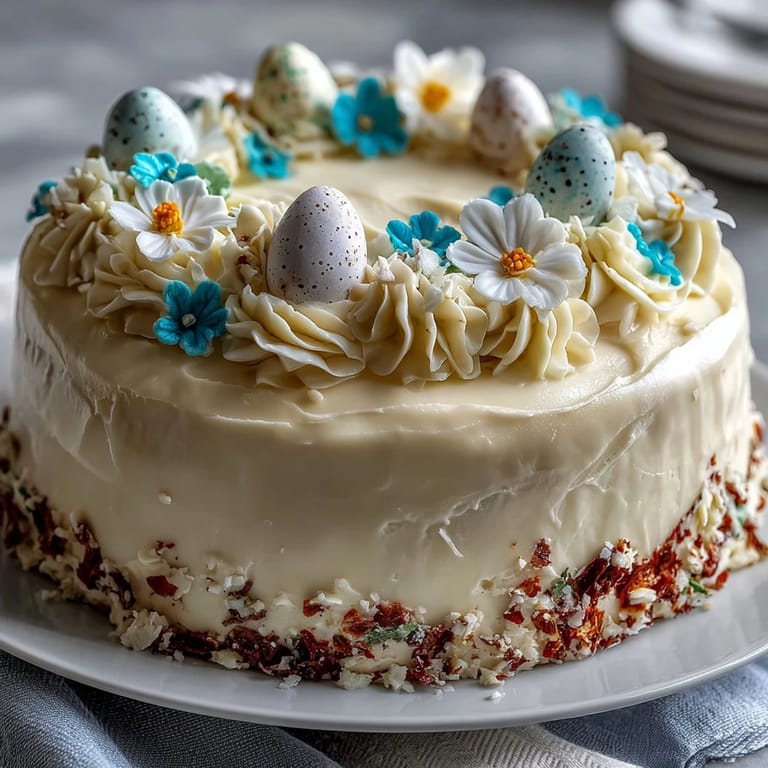
- Divide the buttercream into small bowls and add a tiny dab of gel food coloring to each, stirring until you reach a soft pastel shade. Pastel colors look more refined than bright ones, so go lighter than you think you should.
- Layer the cake:
- Place one cake layer on your serving plate and spread a layer of buttercream on top, then repeat with the second layer and buttercream, finishing with the third cake layer on top. Make sure each layer is level so your cake doesn't lean.
- Apply the crumb coat:
- Spread a thin, even layer of buttercream over the entire cake to seal in crumbs, then chill for 20 minutes so this layer sets. This crumb coat keeps loose crumbs from showing up in your final frosting.
- Decorate with confidence:
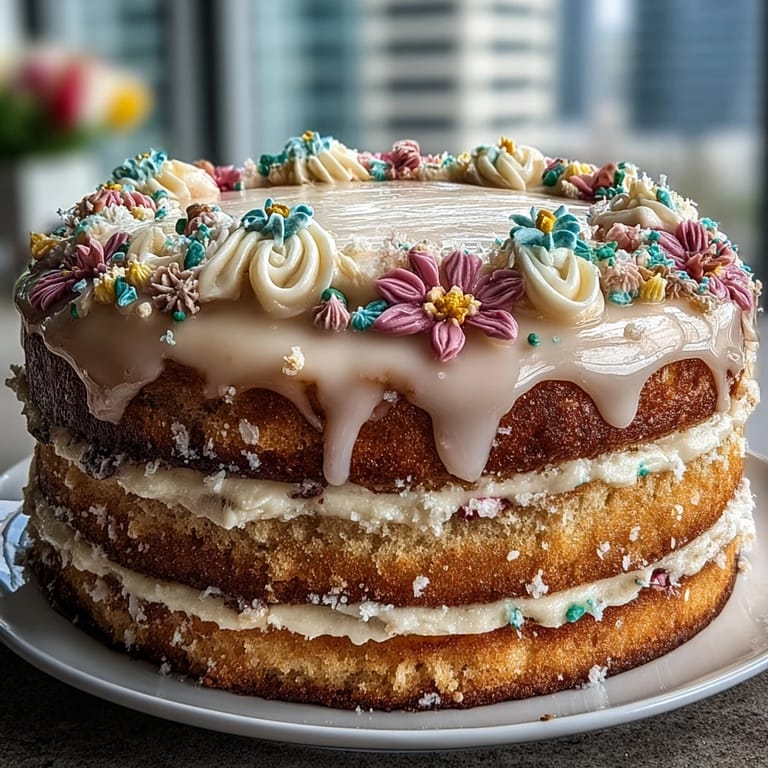
- Fit piping bags with small round or petal tips, fill each with a different pastel buttercream color, and pipe small flowers, swirls, or details all over the cake. There's no single right way to do this, so trust your instincts and remember that rustic charm often looks better than perfection.
- Final chill and serve:
- Chill the finished cake for 15 to 20 minutes so the buttercream sets and holds its shape before slicing and serving.
 Save
Save There's a moment when the last piped flower lands on the cake and you step back to see it all together—that's when you realize you've created something beautiful, something that will sit on a table and make people happy before they even taste it. That moment is worth every bit of the effort.
Timing and Make-Ahead Strategy
You can bake the cake layers up to two days ahead and store them wrapped tightly at room temperature or refrigerated, which actually makes assembly easier because the cake is more stable when it's a day old. The buttercream can be made the day before and kept in an airtight container in the fridge; just bring it back to room temperature and re-beat it for a minute before decorating. If you're decorating the same day you bake, give yourself at least four hours from when the cakes come out of the oven to when you start frosting, otherwise the layers will be too warm and the buttercream will slide right off.
Flavor Variations and Personal Touches
While vanilla is the classic choice, I've added a quarter teaspoon of almond extract to the cake batter and it transforms the whole thing into something more sophisticated without tasting obviously different—people just say it tastes better. For a lemon version, replace half the milk with fresh lemon juice and zest two lemons into the batter, then use lemon juice instead of milk in the buttercream. You can also layer fresh berries or jam between the cake layers if you want extra flavor and moisture, though this means the cake needs to stay refrigerated until serving.
Decorating Without Stress
The truth about cake decorating is that imperfection reads as homemade and intentional, not sloppy—people would rather eat a cake decorated with a little wobble and a lot of heart than a perfect-looking cake made from a box. Start with large piped flowers and fill in gaps with smaller details, dots, or swirls; no one expects uniformity and everything looks charming when you step back. If you make a mistake, just smooth over that section and try again, or hide it under a strategically placed flower.
- A small offset spatula is worth owning because it makes frosting the layers and applying the crumb coat infinitely easier than a regular knife.
- If your buttercream is too soft to hold a shape, chill it for five minutes; if it's too stiff to pipe, let it sit at room temperature for a few minutes or add a teaspoon of milk at a time.
- Remember that the cake will be sliced and eaten, so perfect exterior matters less than delicious interior and the joy of sharing it.
 Save
Save This cake has become my go-to for celebrations because it strikes the perfect balance between impressive and achievable, and every time someone takes that first bite, I see the same expression of pure happiness. Bake it for someone you love, and you'll understand why.
Recipe FAQs
- → What makes this cake texture tender?
The combination of room temperature butter and eggs creamed with sugar, along with alternating the flour and milk during mixing, helps achieve a tender, moist crumb.
- → How is the pastel color achieved in the buttercream?
Gel food coloring is gently mixed into separate portions of buttercream to create soft pastel shades for delicate floral decorations.
- → Can I prepare the cake layers in advance?
Yes, baking layers ahead and chilling them allows for easier assembly and helps maintain the cake's shape during frosting.
- → What decorating tools are recommended for the floral designs?
Using piping bags fitted with varied tips allows for creating intricate floral patterns with the pastel buttercream.
- → Are there any tips to enhance the flavor?
Adding lemon or almond extract to the batter gives an extra layer of subtle, complementary flavor to the vanilla base.